Format formatter = new SimpleDateFormat("EEEE ที่ dd เดือน MMMM พ.ศ. yyyy", new Locale("th", "TH"));System.out.println(formatter.format(new Date()));/* วันอาทิตย์ ที่ 14 เดือน มกราคม พ.ศ. 2525 */Format formatter = new SimpleDateFormat("EEEE ที่ dd เดือน MMMM พ.ศ. yyyy", new Locale("th", "TH"));System.out.println(formatter.format(new Date()));/* วันอาทิตย์ ที่ 14 เดือน มกราคม พ.ศ. 2525 */ใช้สิทธิ์ root เท่านั้น #
# dnf update && sudo dnf upgrade -y
# dnf install https://dl.fedoraproject.org/pub/epel/epel-release-latest-8.noarch.rpm -y
# systemctl stop nginx
# dnf remove nginx
# dnf install dnf-utils -y
# vi /etc/yum.repos.d/nginx.repo
[nginx-stable] name=nginx stable repo baseurl=http://nginx.org/packages/centos/$releasever/$basearch/ gpgcheck=1 enabled=1 gpgkey=https://nginx.org/keys/nginx_signing.key module_hotfixes=true [nginx-mainline] name=nginx mainline repo baseurl=http://nginx.org/packages/mainline/centos/$releasever/$basearch/ gpgcheck=1 enabled=0 gpgkey=https://nginx.org/keys/nginx_signing.key module_hotfixes=true
# yum-config-manager --enable nginx-mainline
# dnf install nginx
# systemctl start nginx
# systemctl enable nginx
# nginx -v
** หมายเหตุเอาไว้หน่อยถ้ามี error (13: Permission denied) while connecting to upstream:[nginx]
# setsebool -P httpd_can_network_connect 1
** สร้างไฟล์ชื่อ domainxxx.com.conf เอาไปไว้ที่ /etc/nginx/conf.d/
upstream ForntEnd {server 127.0.0.1:8001;}server {listen 80;server_name domainxxx.com;access_log /var/log/nginx/domainxxx.com_access.log main ;error_log /var/log/nginx/domainxxx.com_error.log ;location / {proxy_pass http://ForntEnd;}}
เพิ่ม goaccess สำหรับ Monitor log แบบเท่ๆ
# yum install goaccess
** จากนั้นท าการแก้ไขไฟล์ /etc/goaccess.conf โดยเอา # จากแถวต่อไปนี้
time-format %H:%M:%S
date-format %d/%b/%Y
log-format %h %^[%d:%t %^] "%r" %s %b "%R" "%u"
** ทดสอบ
# goaccess -f /var/log/nginx/access.log
# goaccess -f /var/log/nginx/access.log > /usr/share/nginx/html/report.html
This is one of the very tedious task when we want to backup our local Web server setup and Restore or Move it to some other system. Backing up all Project Files is a simple copy & paste task but backing up MySQL database and restoring them is always something where we make mistakes. Specially when the databases are so many or they are huge in size.
I am going to show a very basic steps which are applicable to all kind of web servers including LAMP, MAMP, XAMPP, WAMP.
First of all, you need to make sure that you are able to run mysql & mysqldump commands from any folder using terminal. Mainly on windows, you will have to add Path in the Environment variables which is basically ….mysql/bin/ folder. So you will just have to find where exactly this folder is into your web server’s folders.
Once that is done, follow below steps.
Create a folder named “backups” or whatever name you like and open a terminal from that folder and run below command :
mysqldump -u root -p --all-databases > all-db-dump.sqlThis will ask you MySQL server’s password. Type it and hit enter.
If you run MySQL without any password then use below command
mysqldump -u root --all-databases > all-db-dump.sqlIt will take few minutes if you have so many databases but in will create a file named all-db-dump.sql into your backups folder.
Go to your backups folder where all-db-dump.sql file is placed and run below command :
mysql -u username -p < all-db-dump.sqlIf your MySQL doesn’t have any password then use below command
mysql -u username < all-db-dump.sqlAgain, this will take few minutes but it will definitely restore all the database that we backed up.
I have been using so many different methods like export/import using phpMyAdmin or using MySQL Workbench. But above mentioned are a very simple and standard steps that always works and we don’t need any other tools.
Please share this with others if you find it helpful.
[root@localhost ~]# rpm -ivh http://pkgs.repoforge.org/rpmforge-release/rpmforge-release-0.5.3-1.el6.rf.x86_64.rpm
[root@localhost ~]# yum install wget rpm-build autoconf zlib-devel libselinux-devel libuuid-devel pcre-devel
openldap-devel lua-devel libxml2-devel openssl-devel postgresql-devel mysql-devel sqlite-devel freetds-devel
unixODBC-devel nss-devel expat-devel db4-devel mailcap libtool doxygen bzip2-devel libcurl-devel libjpeg-turbo-devel
libpng-devel libXpm-devel freetype-devel gmp-devel libicu-devel libmcpp-devel gcc-c++ libmcrypt-devel aspell-devel
readline-devel libtidy-devel libxslt-devel
[root@localhost ~]# wget https://geekpeek.net/wp-content/uploads/2016/04/distcache-1.4.5-23.src.rpm
[root@localhost ~]# rpmbuild --rebuild distcache-1.4.5-23.src.rpm
[root@localhost ~]# rpm -ivh /root/rpmbuild/RPMS/x86_64/distcache-1.4.5-23.x86_64.rpm /root/rpmbuild/RPMS/x86_64/distcache-devel-1.4.5-23.x86_64.rpm
[root@localhost ~]# mkdir apache24
[root@localhost ~]# cd apache24/
[root@localhost apache24]# wget https://www.apache.si/httpd/httpd-2.4.41.tar.bz2
[root@localhost apache24]# wget https://www.apache.si/apr/apr-1.7.0.tar.bz2
[root@localhost apache24]# wget https://www.apache.si/apr/apr-util-1.6.1.tar.bz2
[root@localhost apache24]# rpmbuild -tb apr-1.7.0.tar.bz2
[root@localhost apache24]# rpm -ivh /root/rpmbuild/RPMS/x86_64/apr-1.7.0.x86_64.rpm /root/rpmbuild/RPMS/x86_64/apr-devel-1.7.0.x86_64.rpm
[root@localhost apache24]# rpmbuild -tb apr-util-1.6.1.tar.bz2
[root@localhost apache24]# rpm -ivh /root/rpmbuild/RPMS/x86_64/apr-util-1.6.1-1.x86_64.rpm /root/rpmbuild/RPMS/x86_64/apr-util-devel-1.6.1-1.x86_64.rpm /root/rpmbuild/RPMS/x86_64/apr-util-ldap-1.6.1-1.x86_64.rpm
[root@localhost apache24]# rpmbuild -tb httpd-2.4.41.tar.bz2
Wrote: /root/rpmbuild/RPMS/x86_64/httpd-2.4.20-1.x86_64.rpm
Wrote: /root/rpmbuild/RPMS/x86_64/httpd-devel-2.4.20-1.x86_64.rpm
Wrote: /root/rpmbuild/RPMS/x86_64/httpd-manual-2.4.20-1.x86_64.rpm
Wrote: /root/rpmbuild/RPMS/x86_64/httpd-tools-2.4.20-1.x86_64.rpm
Wrote: /root/rpmbuild/RPMS/x86_64/mod_authnz_ldap-2.4.20-1.x86_64.rpm
Wrote: /root/rpmbuild/RPMS/x86_64/mod_lua-2.4.20-1.x86_64.rpm
Wrote: /root/rpmbuild/RPMS/x86_64/mod_proxy_html-2.4.20-1.x86_64.rpm
Wrote: /root/rpmbuild/RPMS/x86_64/mod_socache_dc-2.4.20-1.x86_64.rpm
Wrote: /root/rpmbuild/RPMS/x86_64/mod_ssl-2.4.20-1.x86_64.rpm
Wrote: /root/rpmbuild/RPMS/x86_64/httpd-debuginfo-2.4.20-1.x86_64.rpm
[root@localhost apache24]# rpm -ivh /root/rpmbuild/RPMS/x86_64/httpd-* /root/rpmbuild/RPMS/x86_64/mod_*
-A INPUT -m state --state NEW -m tcp -p tcp --dport 80 -j ACCEPT
[root@localhost apache24]# /etc/init.d/httpd start
Starting httpd: AH00558: httpd: Could not reliably determine the server's fully qualified domain name,
using localhost.localdomain. Set the 'ServerName' directive globally to suppress this message
 [ OK ]
[root@localhost apache24]# /etc/init.d/httpd status
httpd (pid 14317) is running...
[root@localhost apache24]# cd ..
[root@localhost ~]# mkdir php7
[root@localhost ~]# cd php7
[root@localhost php7]# wget -O php-7.0.33.tar.gz https://www.php.net/distributions/php-7.0.33.tar.gz
[root@localhost php7]# tar -xvzf php-7.0.33.tar.gz
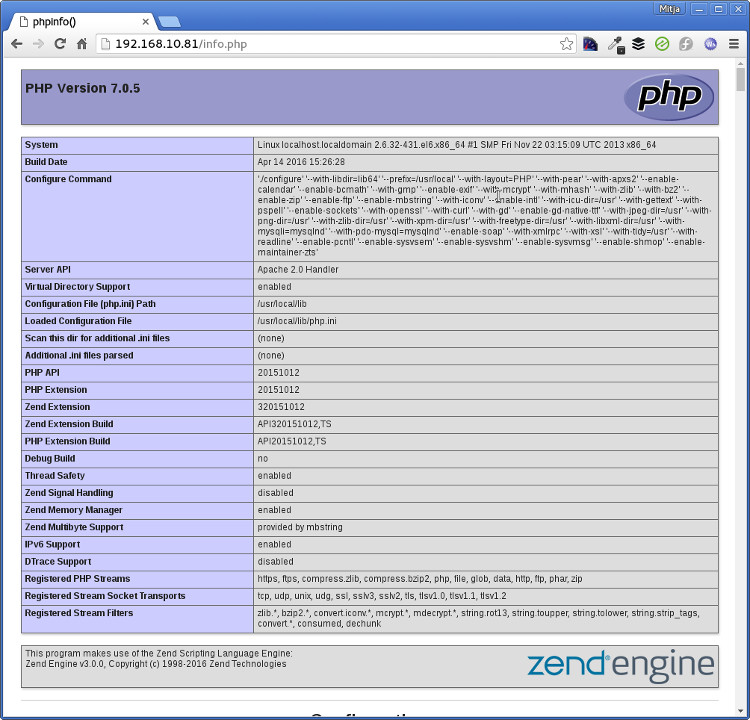
[root@localhost php7]# cd php-7.0.5
[root@localhost php-7.0.5]# cp php.ini-production /usr/local/lib/php.ini
[root@localhost php-7.0.5]# ./configure --with-libdir=lib64 --prefix=/usr/local --with-layout=PHP --with-pear --with-apxs2
--enable-calendar --enable-bcmath --with-gmp --enable-exif
--with-mcrypt --with-mhash --with-zlib --with-bz2 --enable-zip --enable-ftp --enable-mbstring --with-iconv
--enable-intl --with-icu-dir=/usr --with-gettext --with-pspell --enable-sockets --with-openssl --with-curl --with-gd
--enable-gd-native-ttf --with-jpeg-dir=/usr --with-png-dir=/usr
--with-zlib-dir=/usr --with-xpm-dir=/usr --with-freetype-dir=/usr --with-libxml-dir=/usr
--with-mysqli=mysqlnd --with-pdo-mysql=mysqlnd --enable-soap --with-xmlrpc --with-xsl --with-tidy=/usr
--with-readline --enable-pcntl --enable-sysvsem --enable-sysvshm --enable-sysvmsg --enable-shmop --enable-maintainer-zts
[root@localhost php7]# make test
[root@localhost php7]# make install
[root@localhost php-7.0.5]# echo "AddHandler php7-script .php" >> /etc/httpd/conf/httpd.conf
[root@localhost php-7.0.5]# echo "AddType text/html .php" >> /etc/httpd/conf/httpd.conf
<?php
phpinfo();
?>
[root@localhost php-7.0.5]# /etc/init.d/httpd restart
Stopping httpd: [ OK ]
Starting httpd: AH00558: httpd: Could not reliably determine the server's fully qualified domain name,
using localhost.localdomain. Set the 'ServerName' directive globally to suppress this message
 [ OK ]